Table of Contents
1. Overview
The Meta Ads Integration uses the Conversion API to send converted leads to Meta. This integration leverages the_fbc and _fbp cookies to link your converted leads back to their original campaigns and ad interactions.
2. Setup Instructions
Step 1: Configure Conversion Names in Octanist
- Go to Octanist and navigate to General > Manage Conversion Names.
- Under Manage Conversion Names, add clear and descriptive names for your conversions (e.g., Converted Lead - Octanist). If needed, create new conversion names. These will appear in your Meta Events Manager.

Step 2: Set Up the Meta Ads Integration
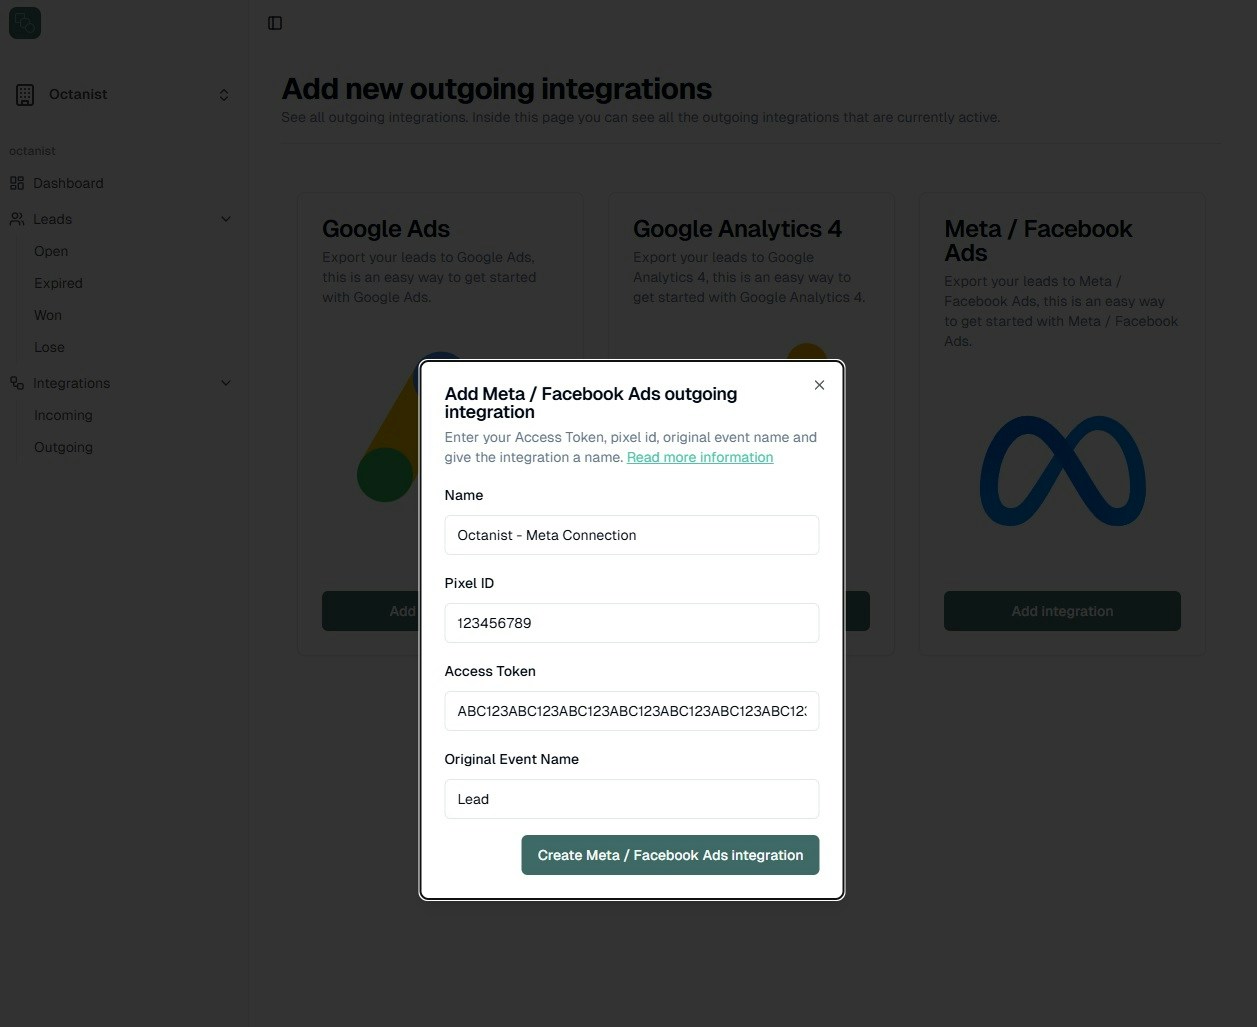
- Go to Octanist and navigate to Integrations > Outgoing.
- Select Meta / Facebook Ads.
-
Fill in the following details:
- Name: Choose a name for the integration (e.g., Octanist - Meta Integration).
-
Pixel ID: Find this in your Meta Business Manager under:
- Events Manager > Data Sources > Your Meta Pixel > Copy Pixel ID.

- Events Manager > Data Sources > Your Meta Pixel > Copy Pixel ID.
-
Access Token: Obtain this in your Meta Business Manager:
- Events Manager > Data Sources > Your Meta Pixel > Generate or Copy Access Token.
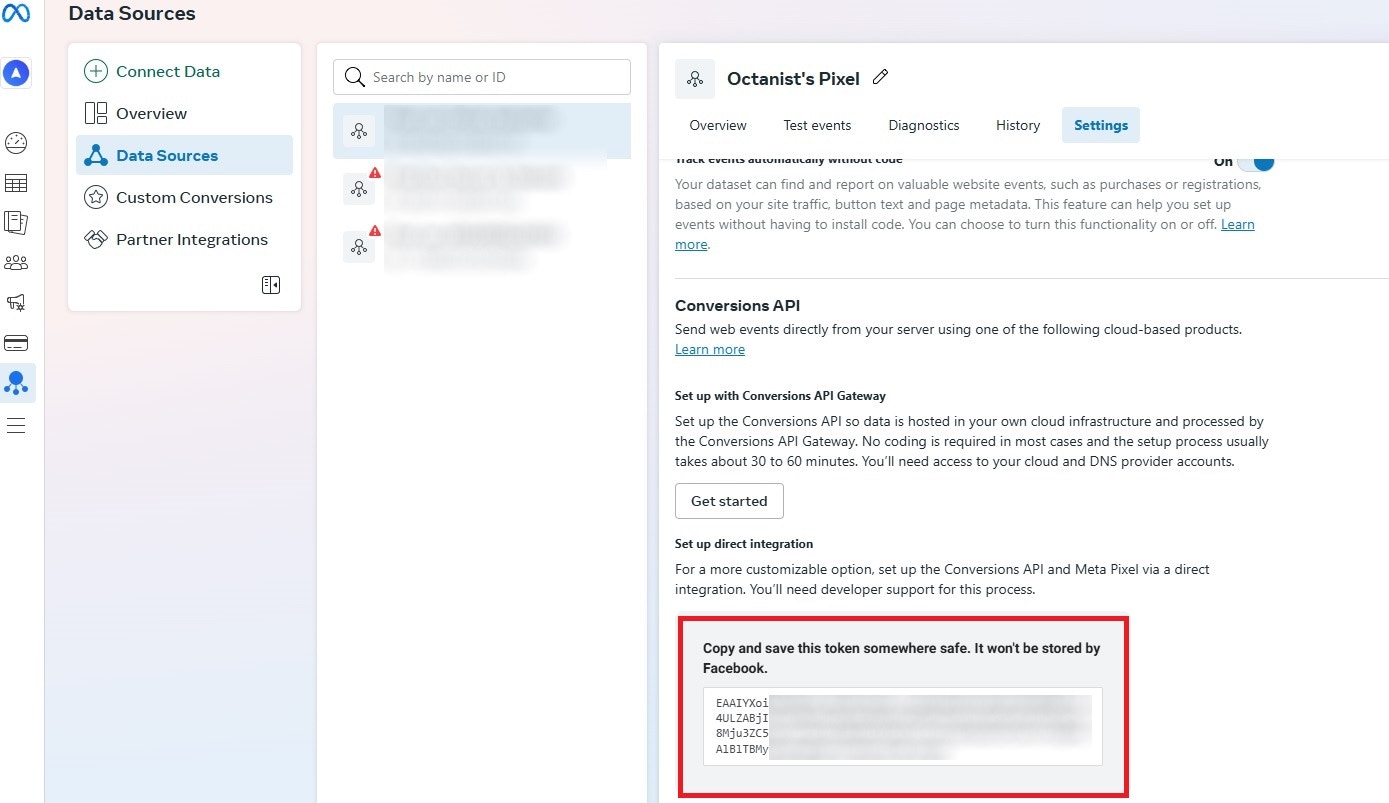
- Events Manager > Data Sources > Your Meta Pixel > Generate or Copy Access Token.
- Original Event Name: Specify the event name that generated the original lead (e.g., Lead, Contact, or Request Quotation). This helps link converted leads back to their originating event.
3. Monitoring Data in Meta
Once the integration is set up, monitor the data flow in Meta by navigating to:- Events Manager > Data Sources > Your Meta Pixel > Overview.